888-963-9454
Mon-Sun: 9am-6pm CST
888-963-9454
Mon-Sun: 9am-6pm CST
Installing a shower filter is one of those DIY tasks that sounds more complicated than it actually is. In fact, adding a shower filter to your bathroom setup can be a straightforward process that yields significant benefits, from softer skin and hair to a cleaner bathing experience. Whether you're a home improvement enthusiast or just looking for ways to improve your daily shower, this guide is for you.
In the following sections, we'll break down the installation process into clear, manageable steps. From selecting the right filter for your needs to the final twist in the installation, we've got you covered. So, grab your tools (you'll likely just need a few), and let's get started on the path to a cleaner, more luxurious shower with our easy-to-follow, step-by-step guide on how to install a shower filter.
Ready to experience the benefits of filtered water? Begin your journey to softer skin and hair with our top-quality shower head filters, designed for easy installation.

If you're looking to improve the quality of your shower water, installing a shower filter is a great start. Shower filters are designed to remove impurities and contaminants from your shower water, providing you with a healthier and more enjoyable shower experience. In this section, we'll explore the different types of shower filters available, as well as the benefits they offer for your skin and hair.
There are several types of shower filters available on the market, each with their own unique features and benefits. Some of the most common types of shower filters include:
Installing a shower filter can have a number of benefits for your skin and hair. Here are just a few of the ways that a shower filter can improve the health and appearance of your skin and hair:
Shower filters are designed to remove a wide range of contaminants from your shower water. Some of the most common contaminants that shower filters can remove include:

Before you start installing your shower filter, it is important to go through a pre-installation checklist to ensure that you have all the necessary tools and materials, and that you are taking the necessary safety precautions. Here are the three important subsections of the pre-installation checklist:
To install a shower filter, you will need the following tools and materials:
Although installing a shower filter is a simple task, it is important to take the necessary safety precautions to avoid any accidents or injuries. Here are some safety precautions to keep in mind:
Before you purchase a shower filter, make sure that the filter is compatible with your existing shower head and faucet. To determine compatibility, you can check the manufacturer's specifications or consult with a professional plumber. Installing an incompatible shower filter can cause leaks and damage to your plumbing system.
Installing a shower filter is an easy process that you can do yourself. Follow these simple steps to install your shower filter:
Before installing your shower filter, you need to remove the existing shower head. Use an adjustable wrench or pliers to carefully loosen and remove the existing shower head. Turn it counterclockwise until it comes off completely. If you are upgrading to a new shower head along with an inline shower filter or are installing a filtered shower head, you can discard the old shower head.
Once you have removed the old shower head, it's time to apply Teflon tape to the shower arm threads. Use a cleaning cloth or an old towel to clean the exposed threads and remove any debris, mold, and existing plumber's tape. Wrap the threads with Teflon tape or plumber's tape in a clockwise direction. This will prevent leaks by creating a watertight seal between the shower filter and the shower arm.
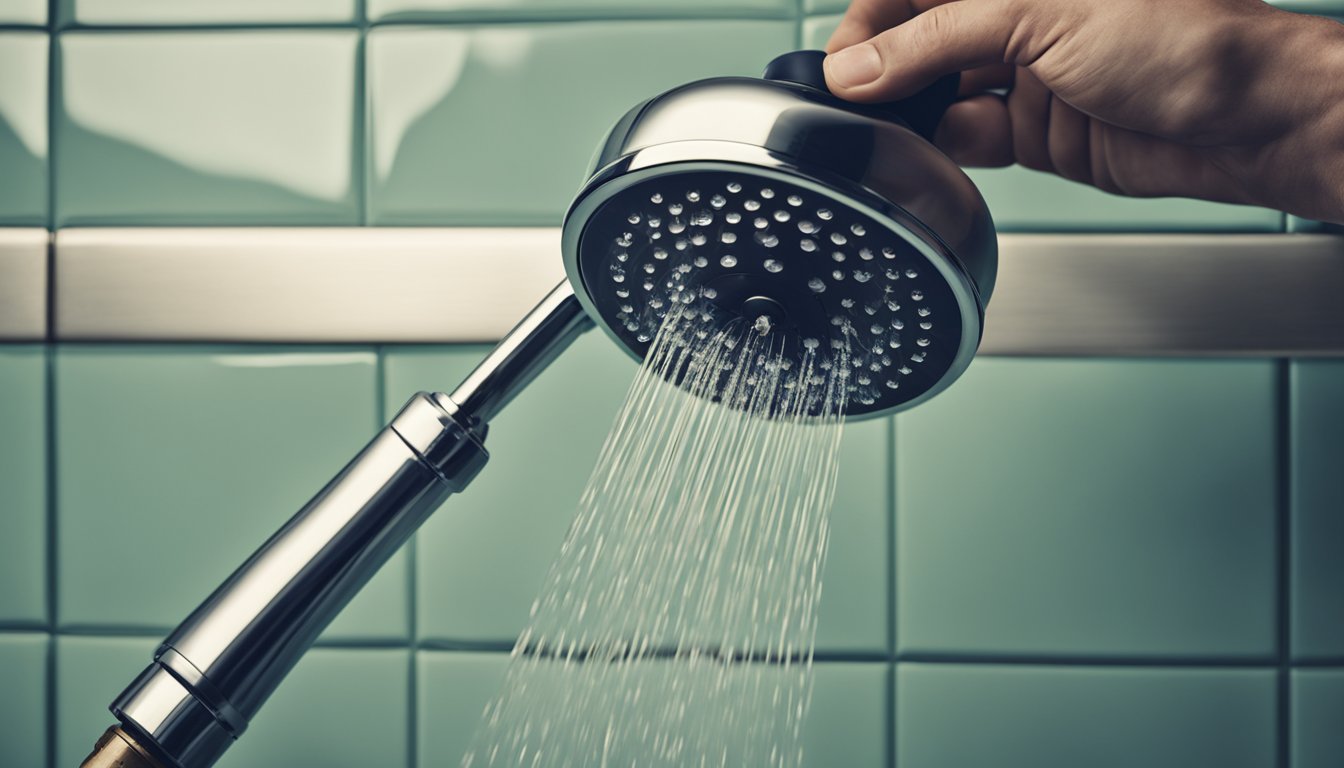
Screw on the shower filter to the shower arm. Hand tighten the shower filter. Once snug, give it a 1/4 to 1/2 turn with the pipe wrench to tighten it fully. Avoid overtightening the shower filter as it may cause damage to the shower arm or filter.
If you have a filtered shower head, you can simply screw it onto the shower filter. If you are upgrading to a new shower head, screw it onto the shower filter. Hand tighten the shower head and then use the adjustable wrench to tighten it fully.
Turn on the water to the shower to check for leaks. If there are any leaks, turn off the water and adjust the shower filter and shower head until there are no leaks. It is important to check for leaks to ensure that the shower filter is installed correctly and working effectively.
Keeping your shower filter in good condition is essential to ensure that it continues to function effectively. Here are some tips on how to maintain your shower filter:
The filter cartridge is the heart of your shower filter, and it needs to be replaced periodically to keep your water quality high. Most filter cartridges last for about six months, but this can vary depending on the quality of your water and how often you use your shower.
To determine when to replace your filter cartridge, check the manufacturer's instructions or look for signs of reduced water flow or a decrease in water quality. If you notice any of these symptoms, it may be time to replace the cartridge.
Cleaning your shower filter is an essential part of maintenance, and it can help extend the life of your filter cartridge. To clean your filter, follow these steps:
If you experience any issues with your shower filter, here are some troubleshooting tips:
When installing a shower filter, it is important to consider the water pressure in your home. Some shower filters may decrease the water pressure, which can result in a less satisfying shower experience. However, there are many high-quality shower filters available that maintain water pressure while still providing excellent filtration.
Various types of shower filter technologies are available, including KDF, activated carbon, and vitamin C filters. Each technology has its own benefits and drawbacks, so it is important to select the one that best fits your needs. For example, KDF filters are effective at removing chlorine and heavy metals, while activated carbon filters are great at removing impurities and odors. Meanwhile, vitamin C filters are excellent at neutralizing chlorine and chloramines.
When selecting a shower filter, it is important to consider the environmental impact of the filter. Some filters may contain harmful chemicals or materials that can be harmful to the environment. However, there are many eco-friendly options available, such as in-line shower filters from companies like AquaBliss and Aquasana. These filters are designed to be long-lasting and can be easily replaced, reducing waste and minimizing the impact on the environment.
Curious about the impact of structured water on your health? Elevate your hydration and shower experience with our range of structured water devices for optimal wellness.
With these steps in hand, you're now ready to take control of your shower experience and enjoy the numerous benefits of filtered water. Not only is the process of installing a shower filter surprisingly simple, but the immediate improvements in water quality can be quite remarkable for your overall wellbeing.
Are you excited to transform your shower into a haven of purity and rejuvenation? Explore our selection of shower and bath filters to find the perfect match for your home. Making the switch is a move towards healthier living, and it's just a few clicks away. Your skin and hair will thank you for it!
Yes, shower filters are generally easy to install and can be done without the help of a professional plumber. Most shower filters come with instructions that are easy to follow, and the process usually takes only a few minutes. All you need is a wrench, some plumber's tape, and the filter itself.
Some shower filters may reduce water pressure, but this is not always the case. If you have low water pressure to begin with, it is possible that a shower filter could make it worse. However, many shower filters are designed to maintain or even improve water pressure while filtering out impurities. Be sure to do your research before purchasing a shower filter to ensure that it will not negatively impact your water pressure.
Shower filters can help reduce the effects of hard water, but they do not completely stop it. Hard water contains minerals like calcium and magnesium which can cause buildup in pipes and on showerheads. While a shower filter can remove some of these minerals, it may not remove all of them. If you have particularly hard water, you may need a more specialized filter or a water softening system.
The frequency with which you should change your shower filter depends on the type of filter you have and how often you use your shower. Most shower filters need to be changed every 6-12 months, but some may need to be changed more frequently. Be sure to check the manufacturer's instructions for specific recommendations.
While some people claim that filtered shower heads can help with hair loss, there is no scientific evidence to support this claim. However, filtered shower heads can help remove impurities from your water that may be damaging to your hair and scalp. This can help improve the overall health of your hair and make it look and feel better.
Most shower filters are designed to fit standard showerheads. They can be easily installed without the need for any special tools or equipment. However, if you have a non-standard showerhead or a showerhead with a unique shape or size, you may need to purchase a specialized filter or adapter to ensure a proper fit. Check the manufacturer's specifications before purchasing a shower filter to ensure that it will fit your shower.